Project Settings
You can change the settings for your project by clicking on the settings tab
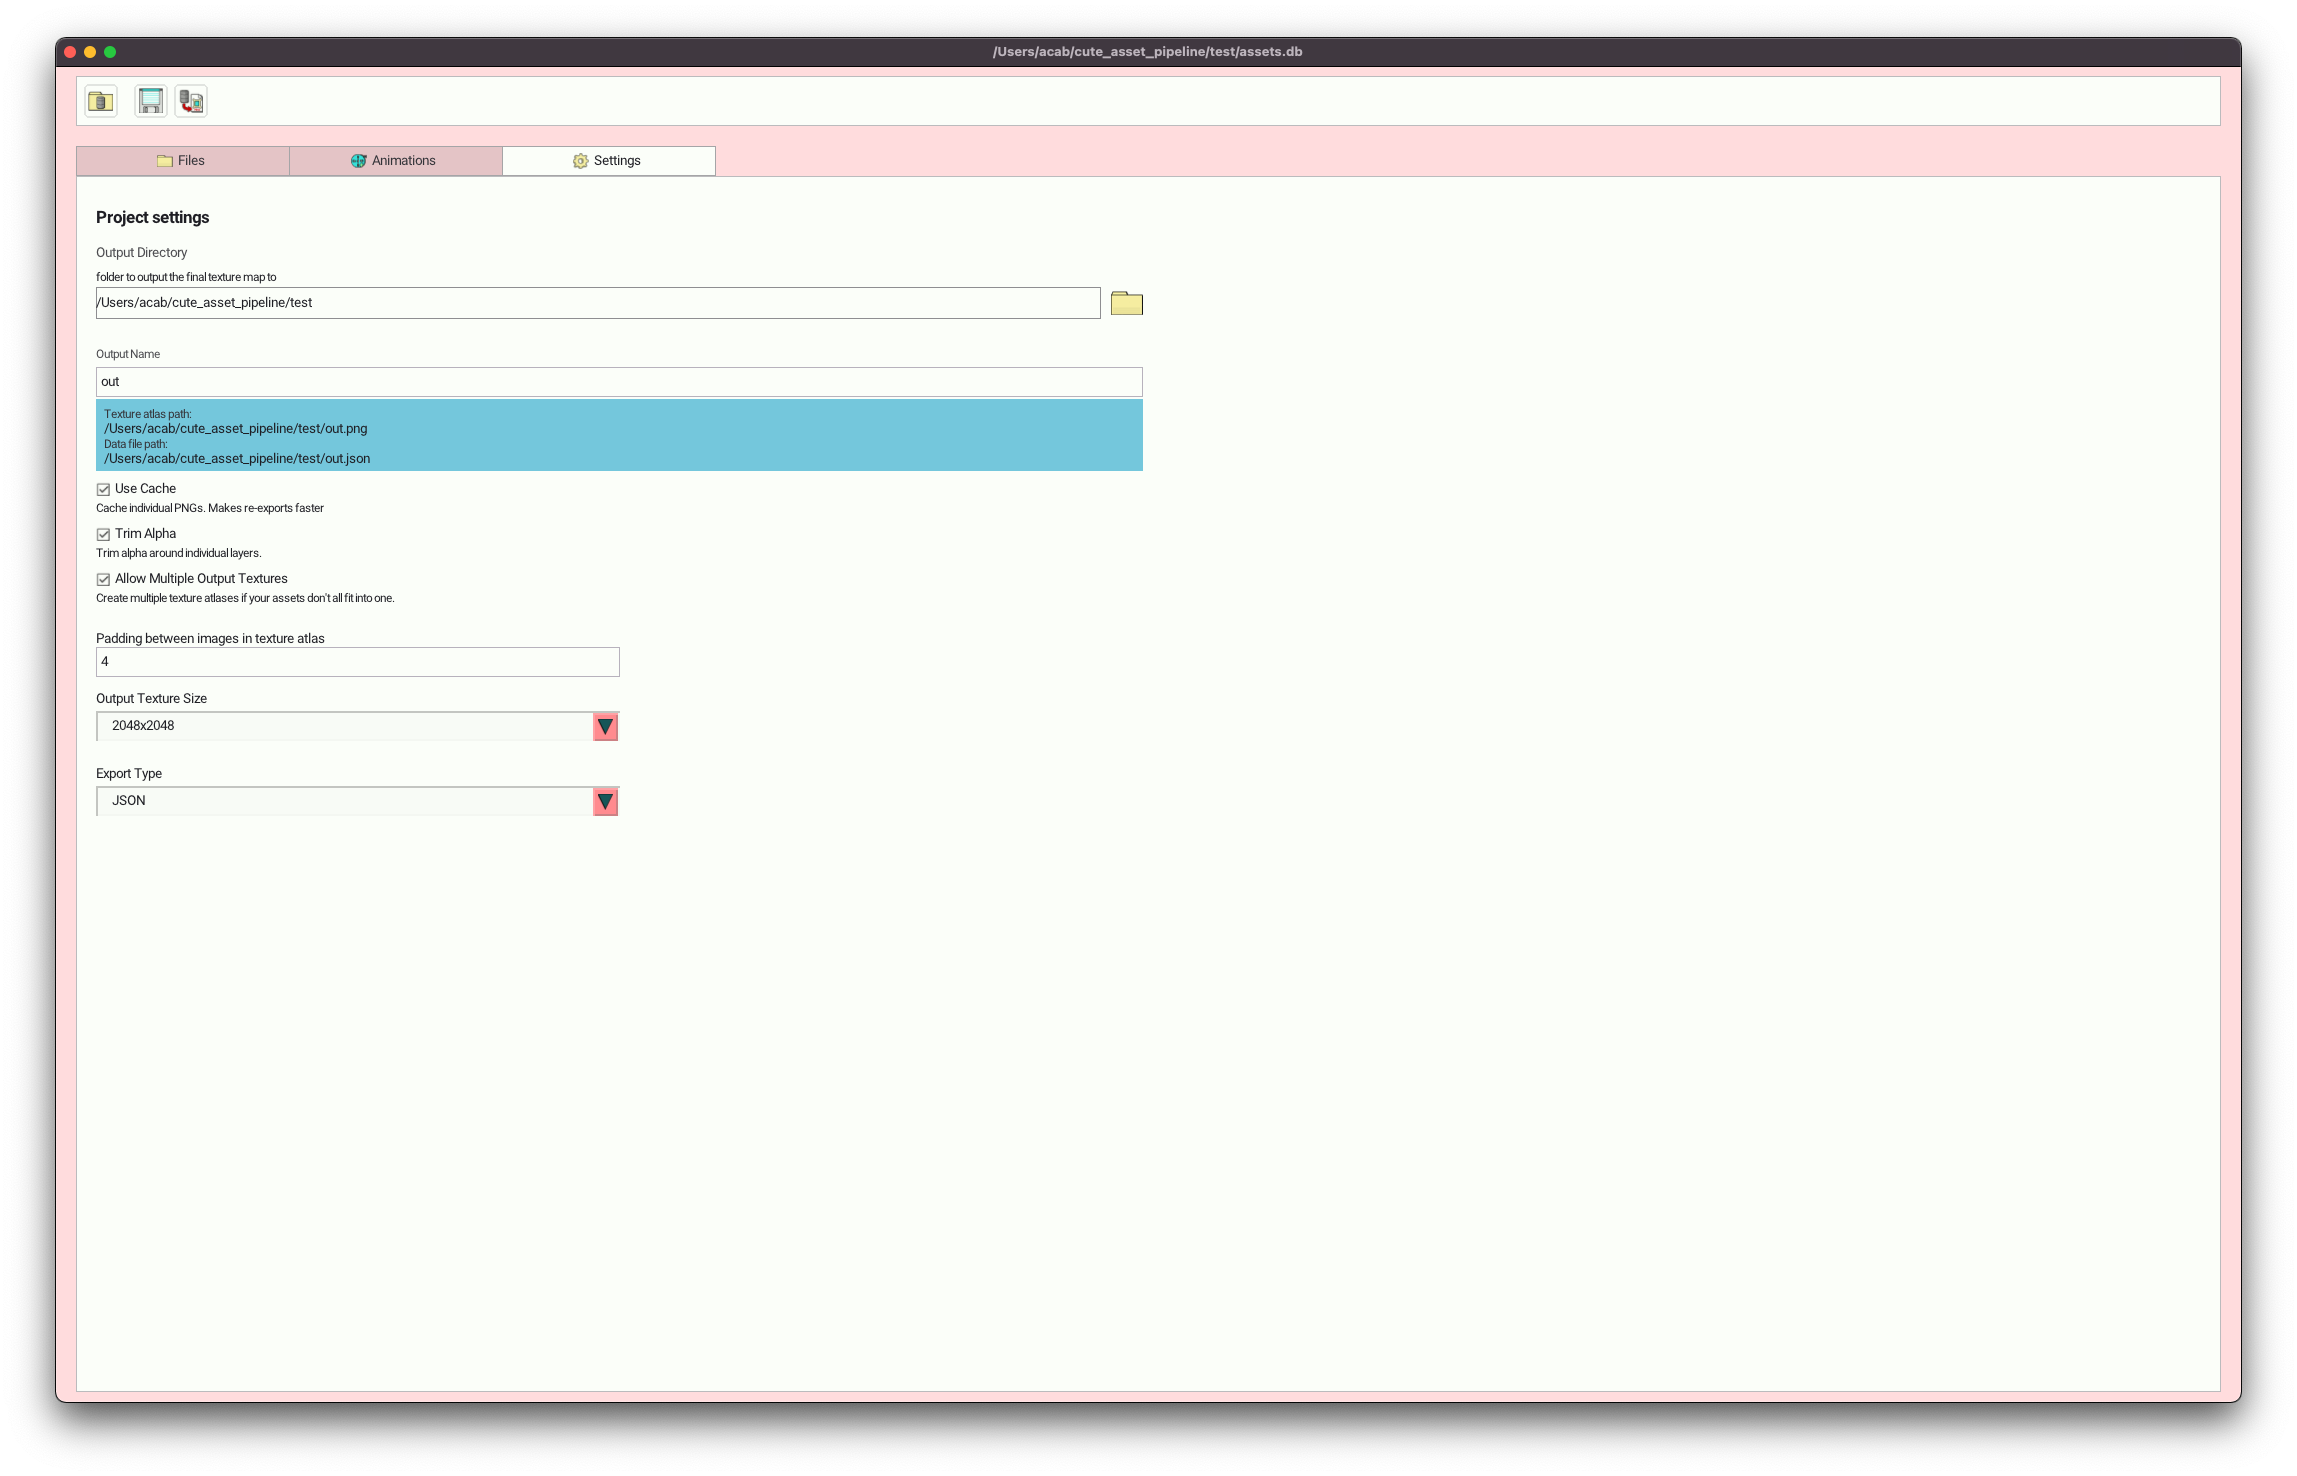
Output directory
This is the directory that your final exported texture atlas and data JSON file will output to.
It is saved relative to the path your project is located at.
By default the output directory will also be in the same directory your project file is in.
You can click the folder icon to change what directory you would like to export your data to.
Output Name
This is the name of the file your texture atlas and JSON data files will be saved as. It is saved to the Output Directory. Changing this value will change the name for the PNG and JSON file. By default the name of these files is assets.png and assets.json
Use Cache
By default Cute Exporter caches individual PNG files into a folder named cache. This folder is in the same folder as your project file. If you have many files in your project the cache should increase the speed of re-exports, only the files that have changed since the last export will need to be re-exported.
If you want to get your layers as individual PNGs, you can also look in the cache folder for them. They are named by their asset id. i.e <asset_id>.png. This will be configurable in the future.
If you don’t want to cache any files at all uncheck this box.
If you want a full clean re-export. Delete the cache folder. It will be remade.
Exporting as Sqlite
You can choose to export your export data to an sqlite file instead of json by selecting Sqlite in the Export Type dropdown. By default sqlite export files will have the extension .sqlite. Sqlite export has an additional option: Save Output PNGs to SQLite.
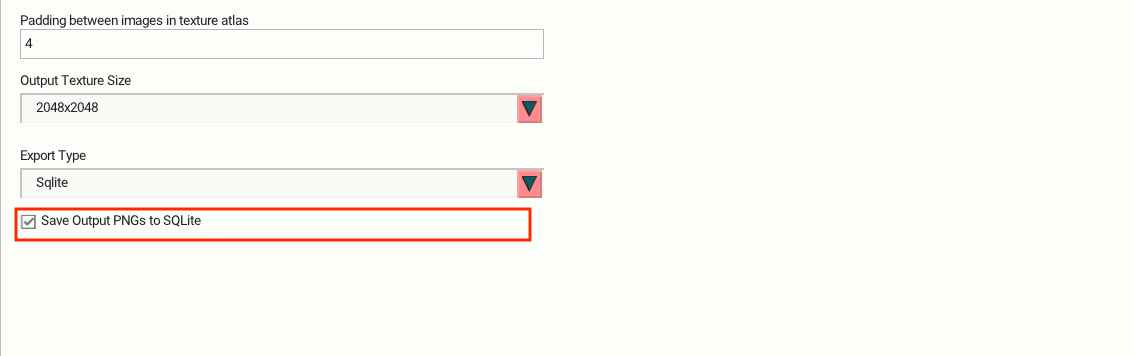
If you select this option all your exported assets will be included as binary blobs in the sqlite database export file along with their corresponding metadata.
Use this for cases where you don't need a texture atlas, but having all your assets bundled into one file would still be convenient. Cute Exporter will also bundle any other non image files you happen to include as binary blobs as well.
Trim Alpha
Cute Exporter can trim the extra alpha transparency around layers. This will lead to your texture atlas being more compact.
Trim alpha will affect every layer of every asset in your project. But you are able to also set trim alpha on a per asset or per layer basis as well.
Export Texture Size
This is the width and height in pixels that the texture will output as. Currently set as powers of 2. If not all layers fit in a single texture multiple texture files will be created. If multiple textures are exported their name will be appended with an _N. N being the texture number they are e.g sprites_1.png and sprites_2.png
The exported JSON file will reference what file an exported layer belongs to.
Custom Template Script
If you want to output your data differently or in a different format other than json. You can specify your own Lua script to run. This will give you total control over the output.
To start check the Use a custom Lua Script box and then select a lua file that you want to be run.
Lua script specification
After the texture has been packed and all the export metadata is known, Cute Exporter will call your script. Cute Exporter looks for a function called onExport in your Lua script. Cute Exporter will pass a data structure containing all the data that would be exported to json. The data will be a Lua table with the exact same names and layout as the default json output.
The doExport function should return a string. The returned string will be what is saved to the output data file.
Custom file extension
When you export your own custom format you likely want to have a custom file extension. You can specify the file extension that Cute Exporter should use in your custom export script. Supply a global variable named outputFileExt.
.). E.g. Use ini not .ini
When you set a custom file extension in your Lua script it will show up in the settings sidebar.

Full Example
This is a minimal full example that will simply save “hello!” to the output data file and uses the custom file extension custom
outputFileExt = "custom"
function doExport(data)
	return "hello!"
end